How to Build a Coffin Shelf: Plans, Angles and Two Builds
Full plans for building a coffin shelf, with the six miter angles worked out, a cut list, and two versions: a small open frame you can make with hand tools, and a full-size carcass that holds real weight.
Almost every plan for a coffin shelf tells you to cut the corners at thirty degrees. That number describes a regular hexagon, which is a different shape with six equal sides. A coffin is an irregular hexagon, and its six joints carry three different angles. This guide gives you the real ones, a cut list you can take to the saw, and two versions of the build: a small open frame that needs nothing but hand tools, and a full-size carcass that can carry books. If you would rather not do the arithmetic, the coffin shelf template tool takes your dimensions and prints a full-size angle gauge.
A coffin is not a regular hexagon
Both shapes have six sides, and that is where the similarity stops. A regular hexagon has six equal edges and six identical corners, so every joint turns by the same amount and every miter is the same cut. That is where the thirty degree advice comes from, and on a regular hexagon it is correct.
A coffin tapers. It has a short head edge, two edges flaring out to the shoulders, two long edges running down to a narrower foot, and a short foot edge. Six sides, four different lengths, three different corner angles. For a shelf twenty inches long and ten inches across the shoulders, the miters come out at 33.7 degrees at the two head corners, 17.4 degrees at the shoulders, and 39.0 degrees at the two foot corners.
Those three numbers are what makes this project fail for most people. Cut all six joints at thirty degrees and the frame will not close, because the angles have to add up around the shape and yours will not.
The angles change with the proportions, so let the tool do the arithmetic
The three angles above are for one particular set of proportions. Make the shelf narrower and every angle shifts. There is a rule underneath it worth knowing, because it means you only have to understand this once: the miter at any joint is half the amount the outline turns at that corner, and the turns around any closed shape always add up to 360 degrees. It is the same rule that gives you forty-five degrees on a square picture frame, where each corner turns ninety.
A useful consequence is that scale does not matter. A twelve inch shelf and a twenty inch shelf with the same proportions have exactly the same angles, so one set of cuts serves both builds in this guide. Only the lengths change.
The coffin shelf template tool does this for whatever size you want. Give it a length, a width and a depth and it returns the cut list, the three angles, the back panel size, and a page of full-size gauges you can print and cut out.
Decide which shelf you are building first
These are not the same project at two scales. They are different constructions, and choosing between them decides your entire materials list.
The small one is an open frame, and it is really a shallow shadow box: a mitered rim about an inch deep with a thin panel closing the back, hung flat on the wall, holding small things. There is no thick base to cut, which is what makes it achievable with a razor saw and a sanding block on a kitchen table.
The full-size one is a carcass. The rim is three to four inches deep, cut from half-inch stock, and the back sits in a rabbet so it braces the frame instead of merely covering it. It holds books and pillar candles, and it wants a powered saw.
The difference lives at one joint. On the open frame the back is a skin glued to the rear face, and the hanging hardware bites into the frame because the back cannot hold a screw. On the carcass the rim is notched so it wraps the panel edge, which stops the whole shape slowly racking out of square on the wall and gives the hardware something to grip.
The small build: an open frame, hand tools only
Around twelve inches long, six across, an inch deep. At that size the six pieces come to roughly three, three and seven-eighths, eight and nine-sixteenths, and two and three-eighths inches, measured along the outside edge. Every one of those fits inside a twelve inch craft strip, so a pack of thin pine gives you the rim with plenty spare for the cuts you will ruin while learning the angle.
A twelve by twelve basswood sheet covers the back with room to spare. It is thin, and that is acceptable here only because the load is light and the hanger screws into the frame rather than the panel. Do not scale this construction up.
Nothing in this version needs a clamp. Lay the six pieces face down in a row in the order they go around the shape, run painter tape across each joint, apply glue to the mating faces, then roll the whole strip up into the hexagon and tape the last joint closed. That is the standard technique for small mitered frames, not a compromise.


The full-size build: a carcass that carries weight
Around twenty inches long, ten across, three and a half deep. The rim pieces come to five, six and a half, fourteen and five-sixteenths, and four inches on the outside edge, and the whole rim needs a little over four feet of stock once you allow for the waste that angled ends generate.
Half-inch Baltic birch is the sensible floor for the rim. It is void-free, which matters because a miter cut through a void in cheaper plywood leaves a hole in the middle of a joint that cannot be filled invisibly. Quarter-inch does the back.
One honest caveat about plywood: the cut edge of a miter shows the plies, and on a mitered corner that edge is on display. If you plan to stain rather than paint, use solid poplar or pine instead, and buy it locally, because dimensional lumber ships badly and arrives bowed more often than not. If you are painting it black, plywood is both fine and stronger.


Cutting an angle that no tool actually has
Here is the practical problem nobody mentions. Hand miter boxes come with fixed slots at ninety, forty-five and sometimes twenty-two and a half degrees. None of our angles is any of those, and an adjustable-angle miter box is not really a product you can buy. So for the small build you do not cut the angle with a tool at all. You mark it from a full-size printed gauge, cut a little proud of the line with a fine-kerf saw, and sand down to the line. The sanding block is the angle tool. The template tool prints those gauges at actual size, along with a bar you measure to confirm your printer did not quietly rescale the page.
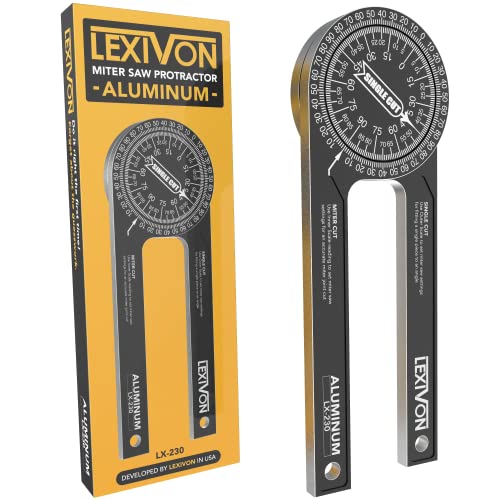
For the powered build the problem is related but different. A miter saw has detents at the common angles and 17.4 degrees is not one of them, so you set the angle with a digital gauge against the blade and the fence, then cut a test joint in scrap and check it before touching your real stock. Two test pieces held together should show no light through the joint.
Whichever route you take, cut all six pieces before gluing anything, and cut the two shoulder pieces and the two body pieces as matched pairs from the same saw setting. Resetting the angle between a piece and its mirror image is how a shelf ends up lopsided.

Every length in the cut list is the long point
Both ends of every rim piece slope the same way, which makes each piece a trapezoid rather than a rectangle. The outside edge is longer than the inside edge, and the difference is not small: on a three and a half inch deep piece with a 33.7 degree miter, each end loses well over two inches between outside and inside.
The cut list gives you the outside measurement, corner to corner, and that is the one to mark. Measuring the inside edge and cutting to it is the single most common way these come out too small, and the error compounds, because every piece is short by the same amount.
Mark on the face you can see while cutting, and mark which end is which before you start. On a shape where four of the six pieces carry two different angles on their two ends, a piece cut with both angles on the wrong ends looks perfectly fine right up until you dry fit it.
Dry fit the whole frame before any glue comes out
This is the step people skip and the reason coffin shelves end up in the bin. A closed shape has nowhere to hide error. Every joint that is slightly off passes its error along to the next one, and the last joint inherits all of it at once. Six joints each half a degree out leave three degrees of gap at the closing joint, and by then five joints are already glued and there is nothing left to adjust.
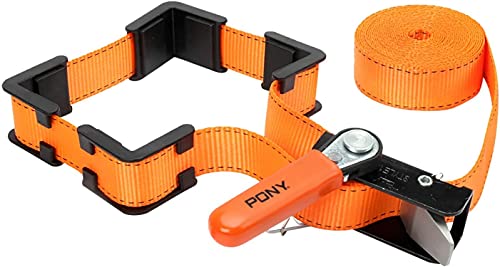
So assemble all six pieces dry, draw them together with a strap, and look hard at the closing joint. If it gapes, the fix is to shave the two closing faces until it does not, or to work out which joint is wrong and recut that one piece. Either is trivial before glue and impossible after.
Then glue. A miter is end grain, and end grain drinks glue, so brush a thin coat on both faces, let it soak in for a minute, then apply a second coat and clamp. Skipping that leaves a starved joint that looks perfect and fails later.

The back panel, and why a strap is the only clamp that works
Corner clamps are built for right angles and a coffin does not have one, so they are useless here. A strap or band clamp pulls all six joints closed at once with even pressure, which is exactly what a closed frame needs. It is the one tool in this build with no reasonable substitute at full size.
Cut the back panel oversize rather than to the outline. Glue the frame down onto it, let it dry, then trim it flush to the frame with a router or a sharp knife. Cutting the panel to the exact shape first means every small error in the frame shows up as a gap along an edge, and you end up with two shapes that do not quite agree.
On the carcass, the rabbet for the back gets cut into the inside rear edge of each rim piece before assembly, not after. Cutting a rabbet on the inside of an already-glued hexagon is a genuinely awkward operation.
Finishing, and the edge that gives a home build away
Sand through the grits before assembly, on the flat, while the pieces are still separate and every face is reachable. Sanding the inside corners of an assembled hexagon is miserable work.
Flat black paint hides plywood edge grain, which is the detail that makes a home-built shelf read as home-built. If you want the grain to stay visible, that is an argument for solid stock and an ebony stain instead, and for accepting that the miters will show a colour difference where end grain meets face grain. End grain drinks stain the same way it drinks glue, so it goes darker. A thinned coat of clear sealer on the end grain before staining evens that out.
Paint or stain before fitting the back panel if the interior is going to be a contrasting colour. Masking a finished interior is far worse than doing it in the right order.


Hanging it
The small one hangs on a sawtooth hanger screwed into the frame, into a drywall anchor. That is genuinely enough for a shallow frame holding small objects.
The full-size one wants a French cleat, which spreads the load along the wall and lets the shelf sit flat instead of tipping away at the top. Find a stud if you possibly can, because a shelf standing three or four inches off the wall puts real leverage on its fixings, and the fixing is almost always what fails rather than the shelf.
What it can then carry, and which anchor suits which wall, is its own subject, covered properly in coffin shelf weight and hanging a coffin shelf.


Common questions
What angle do you cut a coffin shelf at?
There is no single angle. A coffin is an irregular hexagon, so its six joints carry three different miters. For a shelf twenty inches long and ten across the shoulders they are 33.7 degrees at the head corners, 17.4 at the shoulders and 39.0 at the foot corners. The widely repeated answer of thirty degrees describes a regular hexagon, which is a different shape. The angles also shift if you change the proportions, so it is worth generating them for your own dimensions.
Do the angles change if I make the shelf bigger?
Not if you scale it evenly. A twelve inch and a twenty inch shelf built to the same proportions have identical angles, and only the lengths differ. The angles change when you change the shape rather than the size, so a shelf that is proportionally narrower or wider needs its own numbers.
What wood should I use for a coffin shelf?
Half-inch Baltic birch plywood is a good default for a full-size shelf, because it is void-free and a miter cut will not expose a gap inside the joint. Quarter-inch does the back panel. If you want visible grain under a stain rather than paint, use solid poplar or pine, and buy boards locally since lumber tends to arrive bowed when shipped. A small shadow-box version can be built entirely from thin craft strips.
Can I build a coffin shelf without power tools?
Yes, at small scale. A shallow open frame about twelve inches long goes together with a fine-kerf razor saw, a sanding block and glue. Since no hand miter box offers the angles you need, the method is to mark from a full-size printed gauge, cut slightly proud of the line and sand back to it. Painter tape works as the clamp. A full-size shelf in half-inch stock is a different matter and really wants a powered saw.
Why will my coffin shelf frame not close?
Usually one of three things. The angles are wrong, most often because all six were cut at thirty degrees. The pieces were measured along the inside edge rather than the outside, so they are all short. Or error accumulated, with six joints each slightly out leaving the sixth to absorb the total. Dry fitting all six pieces with a strap before gluing catches all three while they are still fixable.
Does a coffin shelf need a back panel?
Not strictly. An open-backed shelf mounted flat against the wall lets the wall colour show through the shape, and some are built that way deliberately. A back does two useful things though: it braces the frame against slowly racking out of square, and on the larger build it gives the hanging hardware something to bite into. It also lets you paint the interior a contrasting colour, which is the version that photographs well.